

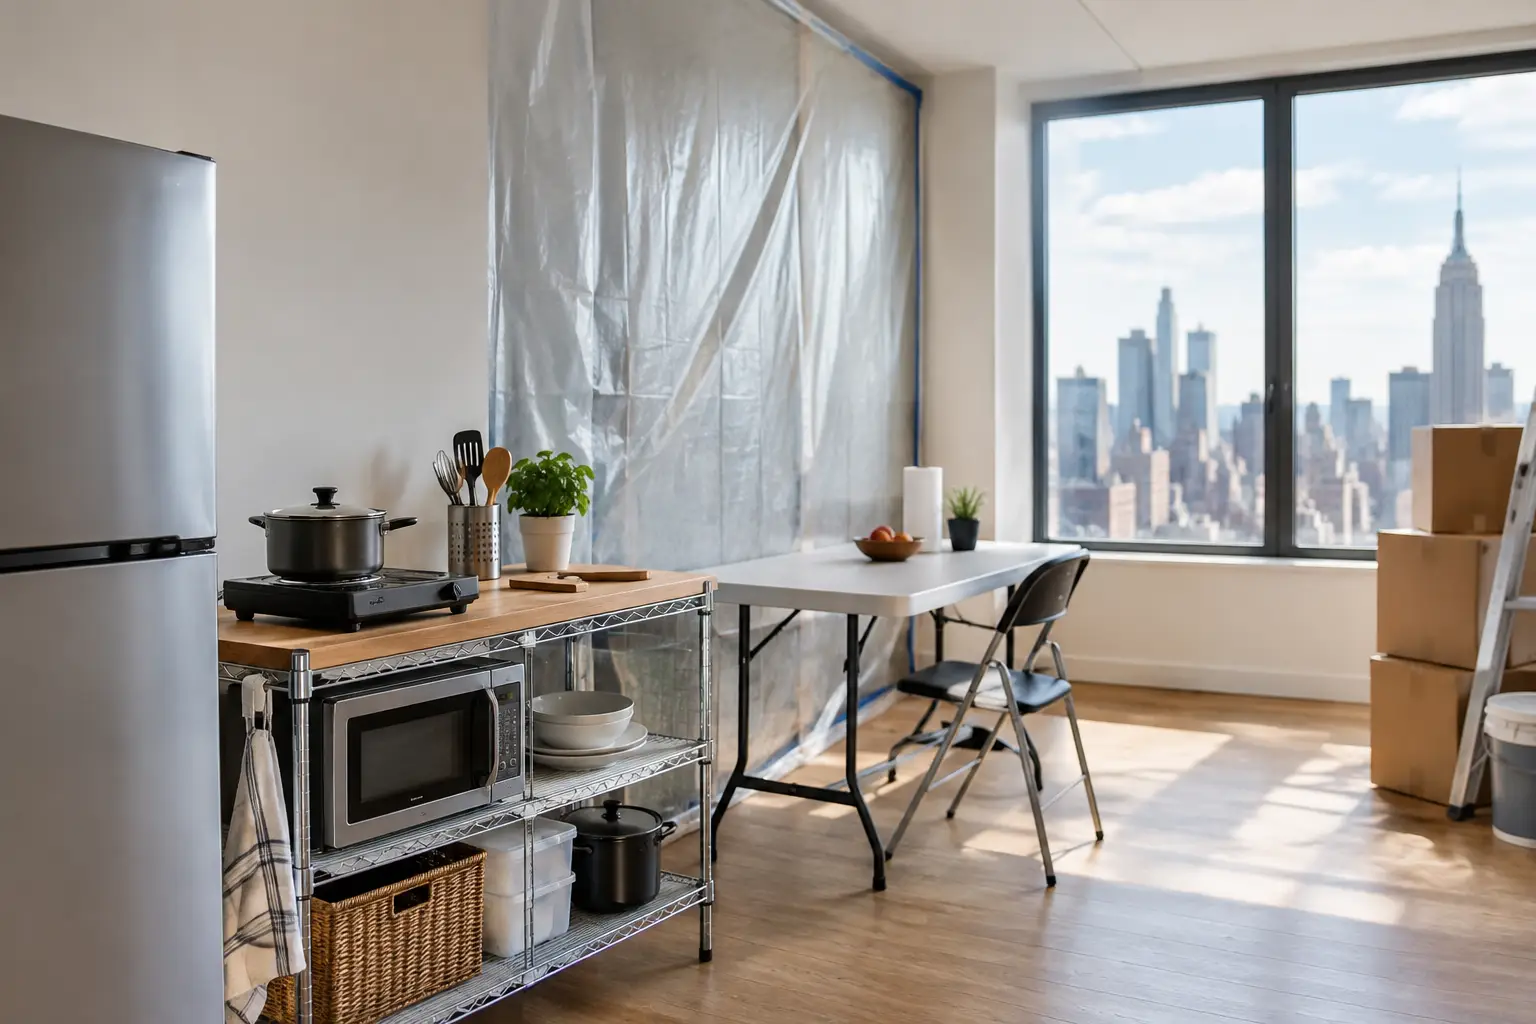
The first week without a kitchen is rarely the difficult part. The real test comes when a delayed appliance delivery, a school morning, a work call, and another night of takeout all land at once. Thoughtful temporary kitchen planning turns that period from an open-ended inconvenience into a managed part of your renovation.
For Manhattan homeowners, the solution is not simply putting a microwave on a folding table. It requires a realistic understanding of your household, the building’s rules, the construction schedule, and the limits of the space available. A well-planned setup protects daily routines while allowing the renovation team to work efficiently and safely.
Start Temporary Kitchen Planning Before Demolition
The temporary kitchen should be planned during the design and preconstruction phase, not after the existing cabinets are removed. By then, furniture may already be in storage, electrical access may be limited, and the best available room may be occupied by construction materials.
Begin with the expected construction sequence. A cosmetic kitchen update may leave you without full cooking capability for several weeks. A full gut renovation involving new plumbing locations, electrical upgrades, custom cabinetry, stone fabrication, and building approvals can require a longer arrangement. Cabinet and appliance lead times also matter. Your temporary setup should be designed for the realistic schedule, with enough flexibility for normal construction variables.
Next, decide how your household actually lives. A couple that routinely dines out may be comfortable with a compact beverage and breakfast station. A family with young children, dietary restrictions, or frequent entertaining needs more capacity. There is no benefit in creating a beautiful temporary kitchen that cannot handle weekday breakfasts, packed lunches, and a simple dinner.
A professional renovation plan should identify the temporary kitchen location, power requirements, water access, storage needs, dust protection, and path of travel before work begins. It is a small part of the overall scope, but it has an outsized effect on how the project feels day to day.
Choose the Right Location, Not Just the Nearest Room
In a Manhattan apartment, space is always part of the equation. The ideal temporary kitchen is often in a dining room, den, large entry area, or a section of the living room. The right choice depends on proximity to a sink, available outlets, ventilation, and how much construction traffic will pass through the area.
A room that is too close to the work zone may expose food, small appliances, and household items to dust despite proper containment. A room on the opposite end of the apartment may be cleaner, but inconvenient if it requires carrying dishes through a narrow hall or past active work. The goal is to create a functional zone without interfering with the crew’s access, elevator reservations, or material deliveries.
For townhomes and larger residences, a secondary pantry, wet bar, or lower-level utility area can be an excellent option. For apartments, a compact setup often works best when it is intentionally organized rather than spread across several rooms. Keeping food preparation, cleaning, and storage in one area reduces clutter and prevents the rest of the home from feeling like a construction site.
Build Around the Essentials
A temporary kitchen does not need to replicate your finished kitchen. It needs to support the routines that matter most. In most homes, that means a dedicated place for refrigeration, heating food, making coffee, washing dishes, and storing everyday items.
If the existing refrigerator can remain connected and accessible, that simplifies the arrangement considerably. When it cannot, a smaller refrigerator or a temporary unit may be necessary. Confirm its electrical requirements in advance and avoid relying on overloaded extension cords. A microwave, coffee maker, toaster oven, or induction cooktop can cover many basic meals, but each appliance adds electrical load and requires a stable, safe surface.
An induction cooktop is often a practical choice because it does not introduce an open flame. Still, it is not suitable for every building or every setup. It requires compatible cookware, proper clearance, and a location away from combustible materials. A toaster oven can be equally useful, yet it produces heat and should never be placed under low cabinets or near temporary plastic dust barriers.
Plan for cleanup as carefully as cooking. If there is a nearby bathroom, utility sink, or wet bar sink available for dishes, establish that as part of the temporary kitchen routine. If not, choose durable disposable dishware for part of the project and arrange a contained dishwashing method. Trying to wash cookware in a bathroom sink without a system quickly becomes frustrating.
Protect Power, Water, and Air Quality
Temporary kitchen planning should never compromise safety. New York City apartments often have older electrical infrastructure, limited outlet capacity, and strict building requirements. Before plugging several countertop appliances into one area, confirm what the circuit can support. A qualified renovation team can advise on safe power access and arrange temporary electrical solutions when appropriate.
Water shutoffs are another consideration. During portions of a kitchen renovation, the existing water supply may be off or plumbing work may affect nearby fixtures. Your project manager should communicate these periods clearly so you can plan meals, dishwashing, and household routines around them.
Dust containment also deserves attention. Properly installed barriers, negative air measures where needed, floor protection, and daily cleanup are fundamental to a well-managed renovation. But containment works best when the temporary kitchen is outside the active work area and household items are not continually moved through the dust zone.
Keep countertop appliances and food storage covered when not in use. Store dry goods in sealed containers rather than leaving open packages in boxes. If the renovation will occur during warmer months, avoid placing a temporary refrigerator in direct sun or an unconditioned area where it must work harder to maintain temperature.
Coordinate With Your Building Before Work Begins
Co-op boards, condominium management, and luxury rental buildings can have detailed requirements affecting where and how a temporary kitchen is arranged. Rules may govern work hours, hallway protection, elevator use, debris removal, insurance documentation, and deliveries. Some buildings also have strict policies regarding cooking equipment outside the designated kitchen area.
Do not assume a portable appliance is automatically permitted in a living room or bedroom. Ask early, particularly if your arrangement includes an induction cooktop, refrigerator, or temporary water connection. A clear plan prevents an avoidable conflict with building management after demolition has already started.
This coordination matters beyond compliance. A renovation team that understands the building’s procedures can schedule deliveries, protect common areas, and keep the work moving without asking the homeowner to resolve logistics at the last minute. For a high-end renovation, that level of preparation is part of protecting the investment.
Make Storage Work Harder During the Renovation
Before demolition, pack the existing kitchen in categories rather than filling boxes at random. Set aside a temporary-kitchen kit with the items you use every day: a few plates and bowls, mugs, glasses, cutlery, one chef’s knife, a cutting board, a saucepan, a skillet, basic cooking utensils, and children’s lunch supplies if applicable.
Everything else should be packed, labeled, and stored away from the active work area. This includes specialty cookware, serving pieces, small appliances you will not use, seasonal items, and unopened pantry goods. It is tempting to keep more on hand than necessary, but excess items make a temporary setup harder to clean and more difficult to protect.
Use closed storage for food, paper goods, and cleaning supplies. A simple rolling cart or freestanding cabinet can create useful order in an apartment without permanent storage. Keep construction-related materials separate from household storage at all times, even in larger homes where space appears abundant.
Budget for Convenience, Not Just Construction
A temporary kitchen has a cost, whether that cost appears as equipment rentals, additional storage, meal delivery, or time spent working around an improvised setup. Planning for it upfront makes the expense predictable rather than irritating.
For some homeowners, a more complete temporary kitchen is worth the investment because it allows the family to remain comfortably at home. For others, especially during a full-apartment renovation, temporary relocation may be the better decision. The answer depends on project duration, household needs, building conditions, and tolerance for disruption.
The most effective approach is honest planning. If you know you will rely on prepared meals several nights each week, account for that. If you work from home and need quiet mornings, consider whether the temporary kitchen location will conflict with construction activity. A detailed renovation estimate should clarify what is included in the project and identify logistics that require a separate allowance.
A Better Temporary Kitchen Supports a Better Renovation
A temporary setup cannot remove every inconvenience from a kitchen remodel. There will still be construction noise, altered routines, and days when access is limited. What it can do is give your household a reliable center while the permanent kitchen takes shape.
At Home Design & Co, planning extends beyond finishes and floor plans to the logistics that determine how a renovation feels while it is underway. When temporary kitchen planning is addressed early, homeowners can make decisions with confidence, protect their home, and stay focused on the refined space waiting on the other side of construction.
Before demolition day, walk through one ordinary weekday in the temporary setup: coffee, breakfast, work, school, dinner, cleanup, and the next morning. If that routine feels workable on paper, the renovation is already starting from a stronger position.